Jewelry dough is a simple way to make all kinds of jewelry that will be entirely unique. You can create pieces
of any size for yourself, friends and family. There are various recipes for making jewelry dough that can be
sculpted into your own designs. Our recipes includes Italian jewelry dough and a salt dough.
For the recipes given here, once the dough is completed it can be manipulated and sculptured on waxed paper to
create the kinds of jewelry pieces you want. These doughs are perfect for necklace beads, brooches and wherever your
imagination takes you. If you intend to make a necklace with the dough, do not forget to add holes before the dough
is fully dried.
Colour can be added at different stages, depending on the dough you use. With Italian jewelry dough color can be added
at the mixing stage. With salt dough, it is best to wait after the dough has rested for one day. Alternatively, you can
decorate with color once you have sculptured your piece.
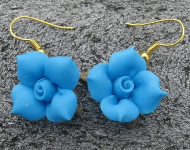
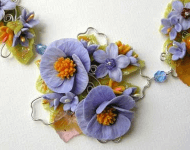
Dough roses are the most popular jewelry flower. If you want to try different kinds of jewelry flowers, consider adding
gems to the center of the flower head or sparkles to the wings of a butterfly for example, before drying.
Italian Jewelry Dough recipe
Your end product has a glossy look without the need for varnishing.
Ingredients
1 cup cornflour,
1 cup German white glue,
1/4 cup water,
1 tsp lemon juice,
1 tsp glycerine,
plus 1 tbs of petroleum jelly for later use.
Method:
Pour the white glue in a non-stick pan and mix in the water to combine to a smooth paste. Mix in the cornflour one tablespoon
at a time, mixing well between additions to ensure there are no lumps. Add lemon juice and mix well. Then add glycerine and
mix well.
Place the pan over a medium heat and with a flat wooden spoon stir the mixture constantly to ensure it does not stick to the
bottom of pan. When the mixture starts to cook, lower the heat, and continue to stir constantly. The mixture will start to
take the shape of ball and will begin to stick to the spoon. Cook the mixture until it is no longer sticky to the touch.
The mixture will be transparent from the outside and a milky white color in the centre.
Be careful not to overcook or the mixture will turn into rubber form and become unusable.
Once the dough is cool, you can start your designs. Depending on the thickness of your jewelry piece, it will generally
take a day for the dough to dry completely.
Salt dough recipe
Ingredients:
½ cup of white glue
2 cups of coarse salt
6 to 8 drops of food colouring (or poster paint)
Method:
Combine the salt and the glue, stirring all contents for 2 to 3 minutes until they are completely combined. Sculpt and mould
desired shapes using your hands. Remember to make tiny holes if you plan to use the pieces for a necklace. Place your designs
on a sheet of waxed paper to dry before painting.
If you want to add color to your dough, keep the dough in an air-tight plastic bag in the refrigerator. For best results mix in
white poster colour after one day. Other colors of poster paint or food coloring can be mixed the same day after mixing the white
colour. Leave the dough for one more day in an air-tight plastic bag to set the color. Then you are free to start your designs.